Download h e r e the template file, unzip it and copy the file awekas_wl.htx to the directory Weatherlink/Station1/Templates. (picture 1). In case of different path names or directory structures, these have to be taken into account.
Download h e r e the actual template file for DAVIS Vantage Pro and Davis Vantage Pro2
Download h e r e the actual template file for DAVIS Weather Monitor 2
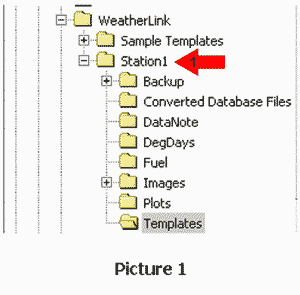
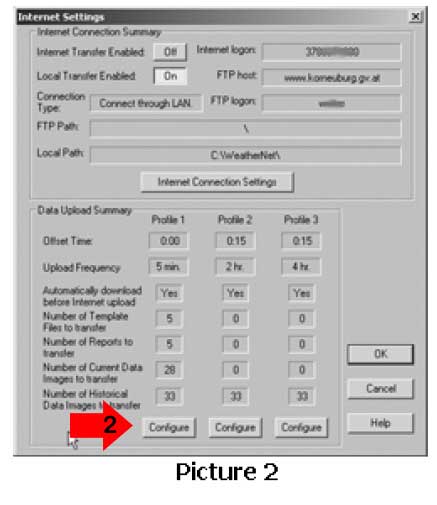
Choose Setup/Internet Settings in the programm WeatherLink. Click the button Configure to select the profile consisting the actual data (Profile 1 as default).
The profile with the lowest upload frequency shall be chosen (picture 2).
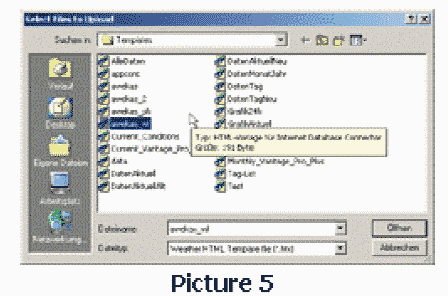
At the menu "data upload profile" choose Select Template Files (picture 3) and click the Add button. Within the overview of template files (picture 4). Then the pop up menu to select the respective Files will be shown (picture 5). Double clicking the file awekas_wl.htx will add it to the templates (picture 4)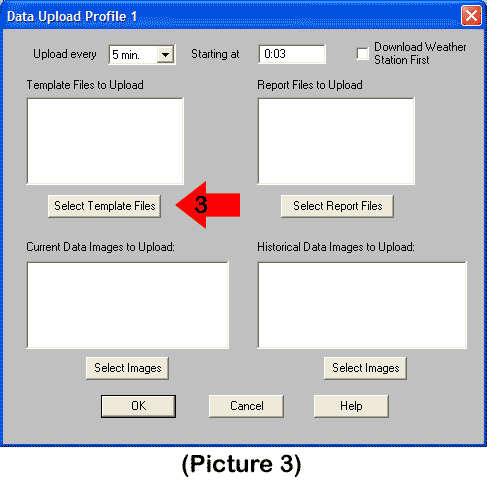
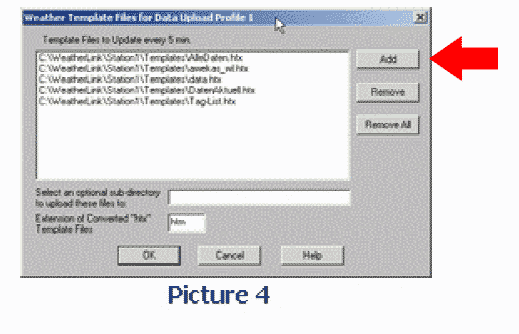
This will generate a actual awekas_wl.htm during every upload to the webserver. This file have to be found in the directory of the actual datafiles. Add the full path (including awekas_wl.htm) at your AWEKAS user profile settings.
Please read this:
If you use fahrenheit , inch ,miles per hour and us date format (mm/dd/yy) instead of celsius, hPA , km/h and european date format (dd/mm/yy) please select the values at your AWEKAS user settings:
https://www.awekas.at/en/benutzer.php
Values from user settings overwrites the values of old (earlier version) template setings.
Please check units at your AWEKAS user profile.
